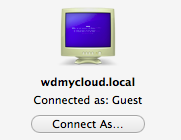
You want to use Time Machine over a remote share. It is important to permanently mount it when you login to your Mac.
As an example let’s connect to a Western Digital My Cloud that has the default name WDMyCloud.
How to mount it
After launching the Finder you may see it at the Shared section
and just click it and connect with the share you want.
If it’s not visible just select from the Finder’s Menu Go / Connect to Server...
At the Server Address: type
cifs://wdmycloud.local
You may change wdmycloud.local with the IP address of your NAS or remote share. Choose the type of connection and then just choose a share. It will show up like this
Auto mounting the share
Select from the top menu Apple / System Preferences... / Users & Groups / Login Items
Click the + button and now select your remote device from the left list under Shared.
Make the connection and select the share you want.
It’s done! Now every time you enter your Mac it will try to mount that share immediately.
A little note…
Apple guys like to be funny. See what would show up if you used smb: instead of cifs:
You may be interested in Using an SMB share from Mac OS X in Linux


Since your blog post comes up fairly high in search results for mounting a CIFS share in OS X, I figured I’d leave this information here: “Why You Should Never Again Utter The Word, “CIFS”” http://blog.fosketts.net/2012/02/16/cifs-smb/